tl;dr My introduction to quadcopters and robotics in which I learned a lot about the quad ecosystem and their constitution. However, I suggest following a smaller, cheaper, and more recent build guide. Although my naivete showed through here, my fascination with quads has not soured; check out my Tello face following and vSLAM project!
Motivation
As much as I like software, I also like hardware. I quickly realized that pure computer science wasn’t going to expose me to much hardware so I took it upon myself in summer 2020 – mid-quarantine – to teach myself. At the time, I was stumbling down a rabbit hole and obsessing over quadcopters, yet I had never laid my hands on one. To me at the time, building a quad from parts was as good a place to start as any.
Cost
To make the journey as painless as possible, I followed a build from a $15 Udemy course that was apparently not a moneymaker because it is no longer listed. The build that I followed was not current; the drone industry moves fast and parts will shift in and out of compatibility. You can find potentially better, much cheaper, sufficiently thorough builds on YouTube. The community is dedicated so up-to-date build guides are very likely.
If you don’t need tools, then this build is approx $500. Again, there are budget drone builds, that are current and probably more satisfying -- don't reinvent the wheel. Or, you could buy a $100 Tello and program the hell out of it.
Part List
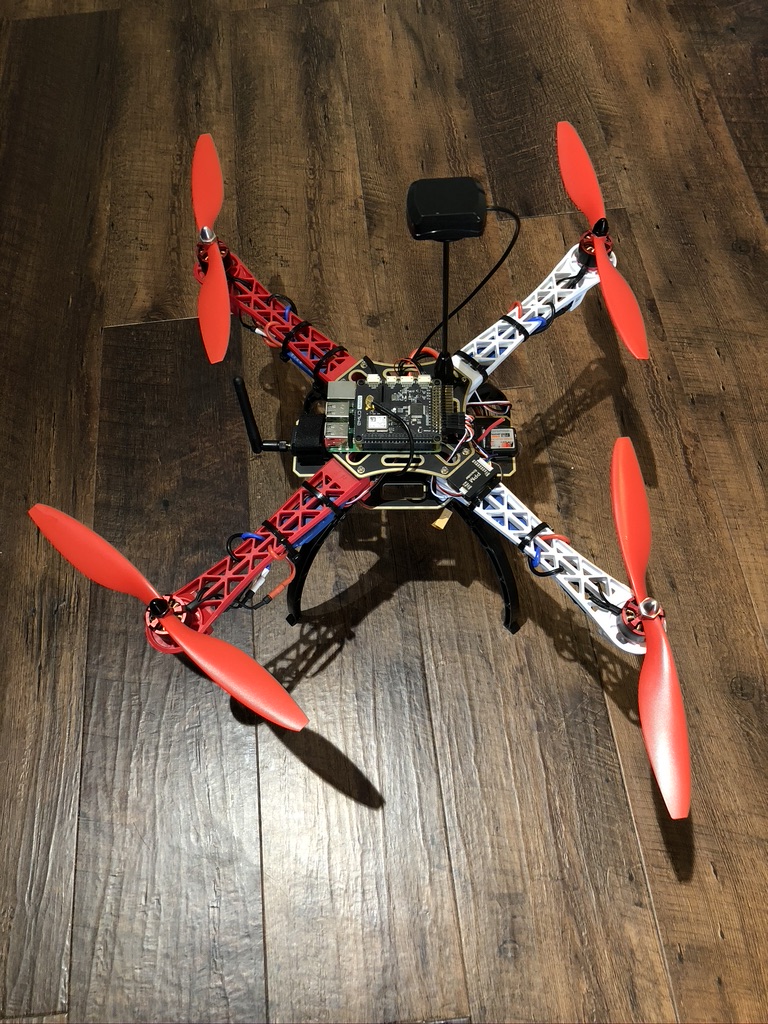
Disclaimer: some of these parts may no longer be available.
Raspberry Pi: https://amzn.to/2mrd72g
NAVIO Kit (Need Power module, wires and GPS): https://store.emlid.com/product/navio2/?wpam_id=3
ESCs 4 PACK: https://amzn.to/2kTweBt
Motors 4 PACK: https://amzn.to/2ltKilA
RC Controller: https://amzn.to/2n05Zdq
Frame: https://amzn.to/2mSmNCW
Props: https://amzn.to/2my3w9C
Battery: https://amzn.to/2kSlzHe
Battery Charger: https://amzn.to/2kXA1hi
Telemetry: https://amzn.to/2myfH6l
LiPo Fire-proof Case: https://amzn.to/2lsRu1i
PPM Encoder: https://amzn.to/2n1hjWR
Micro SD Card: https://amzn.to/2lvcJiS
Micro SD to USB: https://amzn.to/2n09yQQ
Battery Connector: https://amzn.to/2ltOP7A or https://amzn.to/2n0a3KI
GPS Mount: https://amzn.to/2luGOiz
Velcro Straps: https://amzn.to/2lsloTe
Scotch Mounting Tape: https://amzn.to/2mSsdxM
Zip Ties: https://amzn.to/2lveUTA
Additional tools if needed:
Soldering Iron Kit: https://amzn.to/2kZklKw
Helping Hands: https://amzn.to/2lvfxwq
Allen Wrench: https://amzn.to/2mVFfus
Electrical Tape: https://amzn.to/2ls4Niv
Spacer Kit: https://amzn.to/2NTIyeY
Drill and Drill Bits: https://amzn.to/2SQrZBK
Lessons
Building a drone is easy, getting it to fly is hard. Soldering, plugging, and fixing hardware to the frame is like legos. Flashing the flight OS onto the Raspberry Pi + Navio2 flight controller is no problem. Finding a functioning ground control software from this century = yikes. Then you just have to pray that it’s compatible with your flight controller.
On a side note, this drone is deceptively big. Although I’m not an expert aerospace engineer, I deduce that getting big things to fly is much more of a hassle than for small things, especially if you live in an apartment in the city.
One super fun takeaway: learning how components connect to the whole quad, how they communicate with each other, and how a full-fledged cyberphysical system can come together was extremely rewarding.
Large quad with exposed wires and point ends = the ultimate cat chew-toy
Future
Off and on, I may try to get this quad flying. However, it will likely remain a trophy of my first foray into quads, and also a testament to my initial learning curve. As I’ve hinted at many times, I soon intend to follow a smaller, cheaper build. Most importantly, I’m excited to take what I learned here and apply it broadly to other hardware projects.
References
- Caleb Bergquist, instructor of the long lost Udemy course
- Joshua Bardwell
- https://ardupilot.org/copter/docs/common-navio2-overview.html